APPLICATION
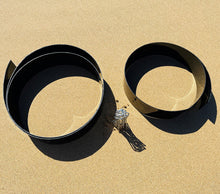
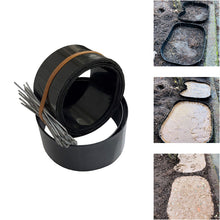
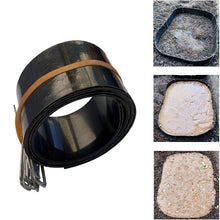
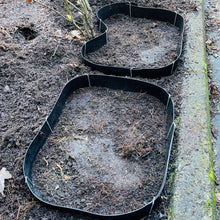
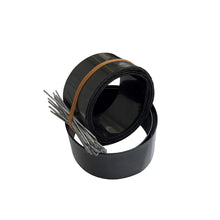
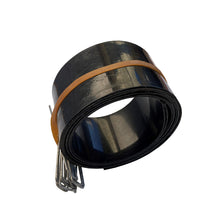
Reusable form for shaping custom concrete stepping stones, paths, and garden walkways. Made from thick, flexible LDPE plastic for smooth release, easy cleanup, and long-term durability.
MATERIAL UPDATE
Previous batches were solid black. Based on customer feedback, forms are now made in white LDPE, a premium USA-made material that is more flexible, UV-resistant, easier to handle, and naturally non-stick for clean removal and long-term reuse.
If your mold is white instead of black, you've received the latest upgraded version.
Unlike cheap vinyl forms, which can warp, crack, or melt when exposed to sunlight, heat from curing epoxy, or even if left in a hot car, LDPE holds its shape and performs reliably in real outdoor conditions.
Most vinyl forms are made in China from low-grade polyvinyl chloride (PVC), a material that contains toxic plasticizers and fillers and is prone to breakdown over time, especially under heat or UV.
We use non-toxic, BPA-free, American-made low-density polyethylene (LDPE), the right material for concrete, epoxy, and safe backyard use.
DO IT YOURSELF
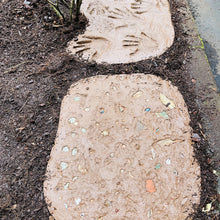
Create your own garden path exactly how you want it. Shape it, pour it, and remove the form in minutes. Paint your stones, add texture, or press in decorative elements. No special tools or experience needed.
DIMENSIONS
Available as a full set or single form:
Set includes
- One 8 ft × 3.5 in flexible form
- One 4 ft × 3.5 in flexible form
- 14 landscape staples (6 in)
Single form includes
- One 8 ft × 3.5 in flexible form
- 10 landscape staples (6 in)
Perfect for making walkways, patio paths, curves, or custom borders.
EASY TO USE
No need to fill or lift heavy molds. Just anchor the form to the ground, pour concrete into place, level the surface, and remove the strip once the mix sets.
Check instructions below.
How to Use Your Flexible Stepping Stone Form Set
This flexible LDPE form is designed to help you shape custom concrete stepping stones directly on the ground. No experience needed. Follow the steps below to get clean, professional-looking results with basic tools.
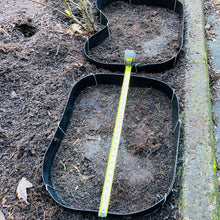
Step 1 - Prepare the Ground
- Choose a flat area where you want the stone to go
- Remove any grass, roots, or loose debris
- Dig a shallow trench matching the width of the form
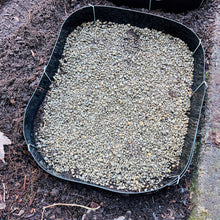
- Add a thin layer of sand or fine gravel at the bottom of the trench
Why: This helps level the form and gives your concrete a stable base. It reduces the chance of cracks caused by ground movement or uneven pressure as the concrete sets.
Step 2 - Shape and Secure the Form
- Bend the flexible form into your desired shape
- Bring the ends together to form a closed loop
- Use the included landscape staples to anchor the form to the ground
Optional: Wrap shipping tape or painter’s tape around the seam where the ends meet. Use high-adhesion tape like orange Contractor Grade or 3M Scotch Exterior.
Always seal the joint if you're using very fluid concrete. If you're working with epoxy, use Tuck Tape (red sheathing tape) to prevent leaks.
Step 3 - Apply Mold Release (Optional)
The LDPE material is naturally non-stick, but a release agent can make removal easier and protect the form over time.
Apply a very light coat of one of the following:
- Silicone-based mold release
- Motor oil
- Non-stick cooking spray (like PAM)
Wipe off any excess before filling. A thin, even film is all you need.
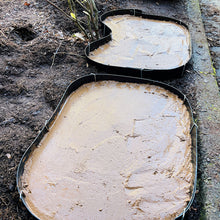
Step 4 - Mix and Pour the Concrete
- Mix concrete to a thick, scoopable consistency - like oatmeal
- Pour or scoop it into the form
- Press the mix into corners using a trowel or gloved hands
- Gently shake or tap the form to help release air bubbles
Why: A thick mix helps hold shape better and minimizes mess. Tapping reduces weak spots or surface voids caused by trapped air.
Slightly overfill the form to allow for leveling.
Step 5 - Level and Finish
- Use a flat board, stick, or trowel to scrape excess concrete off the top
- Smooth the surface with a trowel or leave it rough with a broom
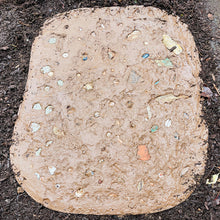
- Optionally press in stones, stamps, or decorative textures while wet
Why: Leveling ensures uniform thickness. Finishing improves appearance and helps with water drainage.
Step 6 - Remove the Form
- Once the concrete has set enough to hold its shape (usually 30 to 90 minutes), gently lift and remove the form
- The LDPE surface will release cleanly without tools or force
Do not wait for full hardening. Removing the form while the concrete is still green allows you to smooth or round the edges, add texture to your stone, and clean up the flex form easily before concrete sets completely.
Step 7 - Final Curing
- Cover the stone with plastic to slow drying and prevent surface cracking
- Let the stone cure in place for 24 to 48 hours
- Mist with water during the first day if the weather is hot or dry
- Allow 5 to 7 days for full strength if possible
Note: Fast-setting concrete may cure enough for light use in under 24 hours, but full curing improves long-term durability.
Cleanup and Storage
- Rinse the form with water immediately after use
- Do not use harsh cleaners or abrasives
- Dry completely before storing
- Store flat or loosely coiled, out of direct sunlight
Why: Proper cleaning and storage extend the life of your mold and preserve its shape.
Epoxy Users
This mold is designed primarily for concrete, but can also be used with epoxy. Follow these extra steps:
- Always seal the joint
- Ensure the form is placed on a perfectly level surface
- Pour slowly and monitor for leaks, Tuck Tape helps
- Follow all epoxy curing instructions
For More Tips and Ideas
Check our concrete mold instructions:
https://autumndirect.com/pages/concrete-mold-instructions


